
Creating XML template from scratch
Learn how to export your Prestashop data into XML format
I’m sure you know that DataKick has many predefined templates ready to be used. For example our store has templates to generate XML feeds for Facebook or Google Merchant Center.
But sometimes none of the prepared templates meet your needs and so you have to create a new template from scratch. In this tutorial I’m going to show you how to do it. Don’t worry, it’s not as complicated as it sounds.
XML description
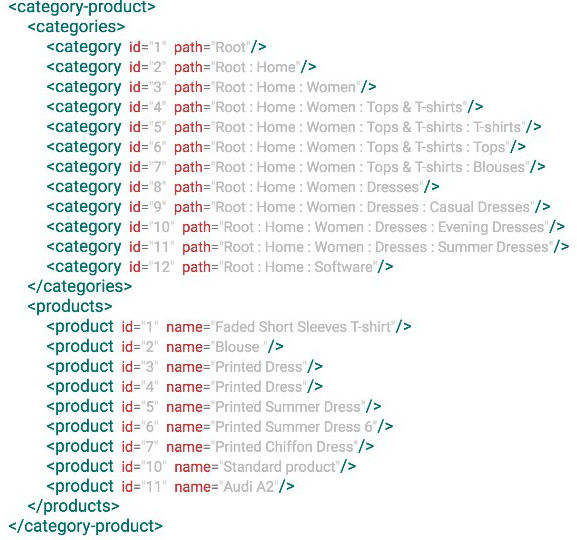
Ok, here’s the assignment. Our affiliate partner would like to have access to XML feed containing two sections. One section, <categories> , should list all our categories. The other section, <products> will contain all products in the system with information about product id, name and categories associations.
This is example XML
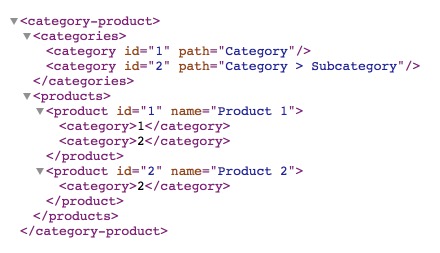
In real-world scenario there would be much more data involved, but let’s keep it simple for tutorial purpose.
Step 1 - Create XML Template
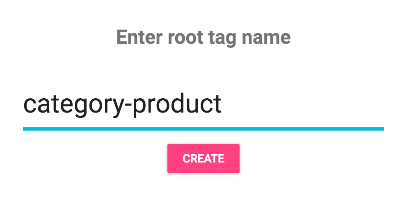
Well, let’s get started. Sign in to your prestashop administration panel and open datakick module page. Navigate to XML Template list and click on create new XML Template. You will be asked to enter root element name. Let’s enter category-product and hit create.
Step 2 - create root sections
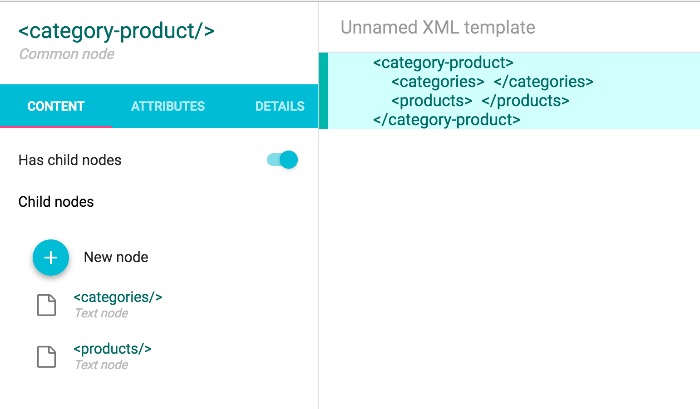
Now we are in XML Template Editor that is displaying our new, still empty template. According to our task, we need to have two main sections. So let’s create them.
In left panel, click on New node, and enter categories as a tag name. Repeat for products sections. Your template should look like this:
Go ahead and click on Preview button in upper right corner. This will generate XML file and show you the preview. The result should be identical to our template. That’s because our template is static - we don’t pull any data from prestashop database yet. Let’s fix this.
Step 3 - Export categories
Select categories tag in right panel by clicking on it;
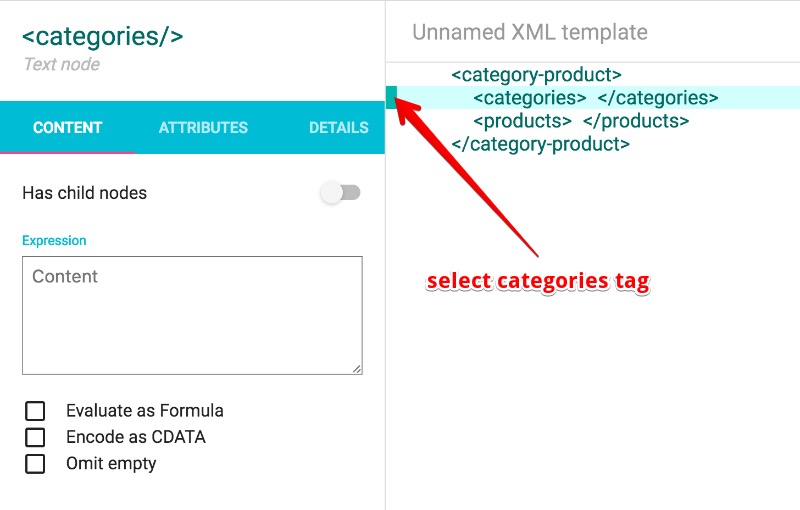
Left panel will show information about this node. In content section we can see that this is an empty text node - it does not have any children. You can enter some text in expression text area and try preview again. This is how you can create tags with static text.
According to our assignment this node should contain categories. So lets toggle Has child nodes on to change this text node to common node. Now we can add children nodes.
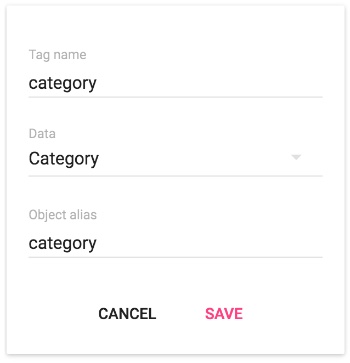
Click on New node, enter category as a tag name and Category as data. Take a note of object alias, and then hit save.
You can now switch to preview mode once again. You should get result similar to this
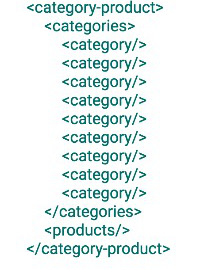
This is getting interesting. As you can see, our new category tag is repeated for every category in our database. The tag is still empty, though. Switch back to edit mode, and select the new category tag. We don’t want this node to have any content, so we can ignore Content tab. Switch to Attributes tab. As you can see, there’s plenty of predefined attributes. By clicking on any one of these, they will be added to attribute list for export. Go ahead and click on id and path. Template should look like this.
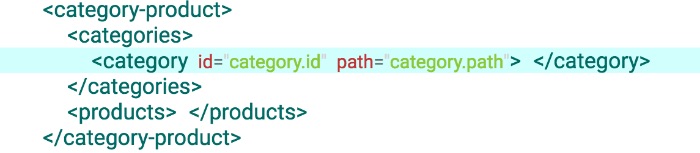
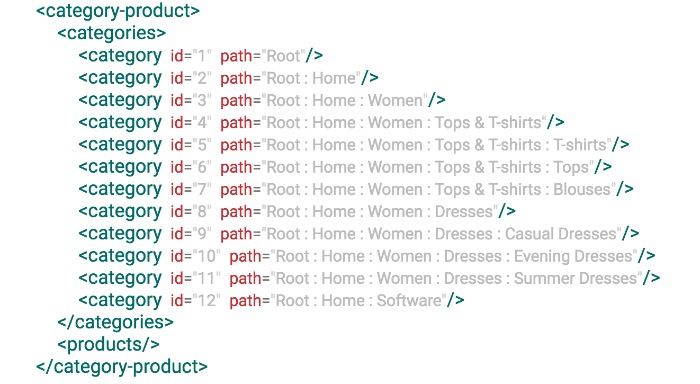
And result of preview
Step 4 - Export products
We will repeat the same steps we did for category tag
- select
productstag - toggle Has child nodes
- add new
productnode, this time set data toProduct - select
productnode and switch to Attributes tab - add
idandnameattribute
Your preview result should be similar to this
Step 5 - Export product / category associations
Ok, this looks pretty similar to our assignment. The only think that’s missing is product / category association.
What we need id for our product to have children category nodes. You already know how to create child nodes - select product node, switch to Content tab and toggle Has child nodes on.
Now, you could create the child node from scratch. But there is another way to create child nodes - simply by selecting them in predefined nodes section. look at predefined nodes section.
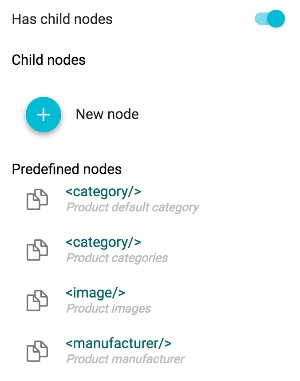
As you can see, there are two predefined nodes named category. One shows data associated with product default category, the other one shows all categories associated with product. This is the one we want.
Click on the newly added category node, and examine content tab.
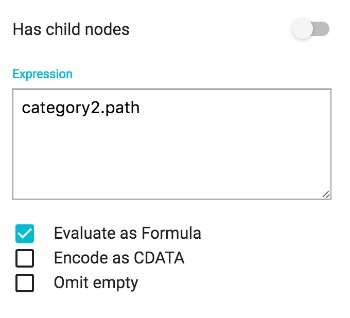
You will see that this node content is dynamic because Evaluate as formula is switched on. The expression says category2.path - we need to change this to category2.id to display category id instead of category path.
Result
And we are done. That wasn’t so hard, was it?
If you wish, you can download this XML template (right-click and Save As) and upload it to your store, so you don’t have to create it yourself.

Let’s experiment a little bit more
Here are some additional things to do or try
Export only active products
How about exporting only active products, or products with quantity on stock? Simple.
- select
producttag - switch to Details tab
- add condition
product.active - add condition
product.quantity > 0
How to change delimiter of category path
Our exported category paths look like
category: subcategory
But we would like to change it to look like this:
category > subcategory
We can use join function to achieve this.
- select
categorytag - switch to Attributes tab
- select
pathattributes - change formula to
join(category.path, ' > ')
Root category is exported
Prestashop has build-in root category named Root. If we don’t want to export this category, we can filter it out.
- select
categorytag - switch to Details tab
- add condition
category. id > 1
That will remove root category entry. We sill need to remove it from category path
- select
categorytag - switch to Attributes tab
- select
pathattributes - change formula to
join(tail(category.path), ' > ')
The tail function will get rid of first element
Now it’s your turn
Now it’s your turn to experiment with the DataKick module. Let me know if you encounter any issue or have a problem that you can’t solve. I’d be more than happy to help.