XML Editor
how to use XML Editor
XML Editor is an user interface for creating and modifying your XML templates. It will be shown when you click on Create new XML Template or Edit XML Template buttons in XML Template List.
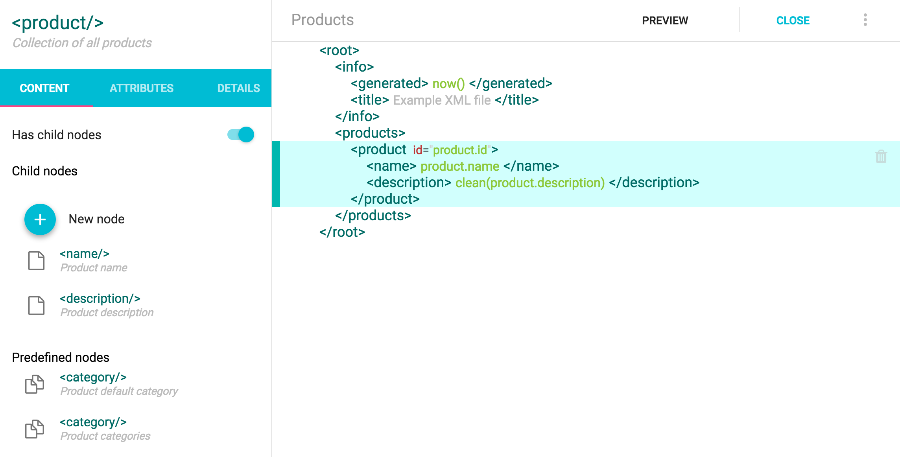
XML Editor consists of two main parts. Right panel displays an actual XML template. This template is interactive - you can select, delete, or even rename nodes from here. Above the template is located a toolbar displaying template name, which is editable, and buttons to preview the data and save / close editor.
Left panel displays information about currently selected node. You will do most of your work here. Context panel has three main sections:
Content tab
In this tab you can define the content of the node. Nodes can either contain text or child nodes. This is controlled by Has child nodes toggle.
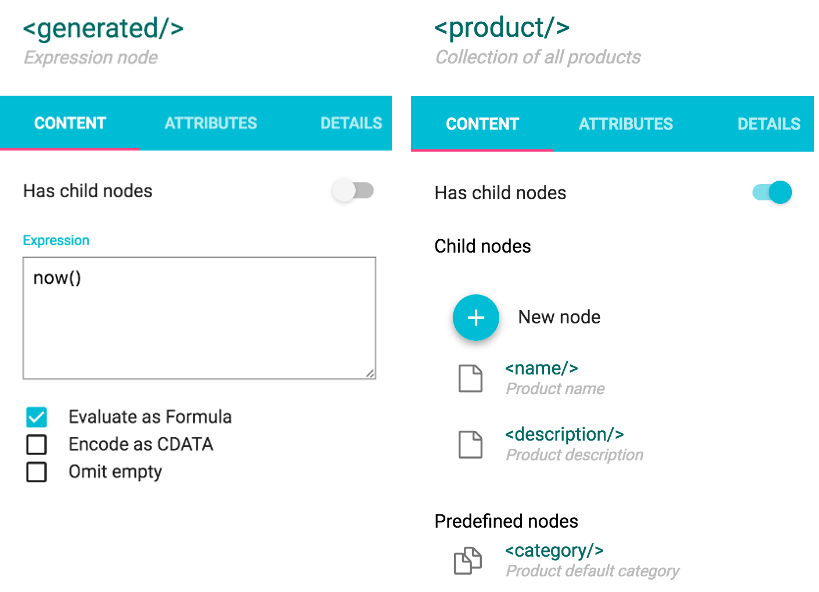
Text nodes can contain either static/free text (will be copied to output unchanged), or an expression. This behavior is controlled by Evaluate as expression checkbox. You can also specify if you want to encode text as CDATA and if you want to omit empty nodes (in case expression evaluated to empty string).
Node with children displays list of its child nodes. You can select or delete any one of them. You have an option to create a new child node from scratch by clicking on New node button. There is also a list of predefined node for your convenience - you can quickly add child node by simply clicking on them. The list of predefined nodes contains both common and data nodes - you can distinguish between them by the icon.
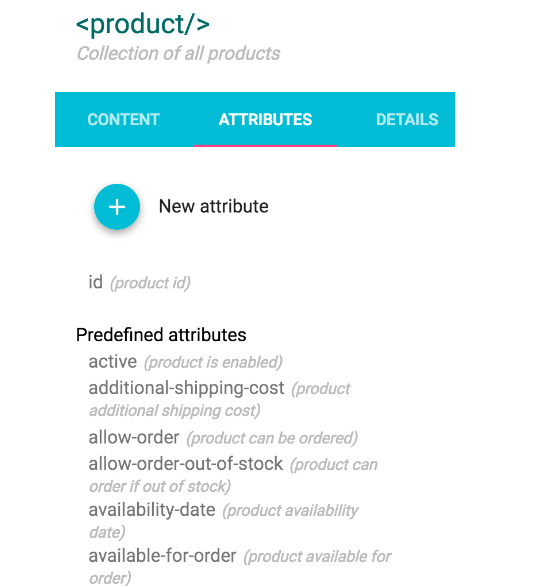
Attributes tab
In this tab you can define node attributes. You will see list of current attributes, with options to edit or delete them. You can create a new attribute by clicking on New attribute button, or by selecting one of the predefined attributes.
Details tab
Detail tab allows you to specify following node metadata:
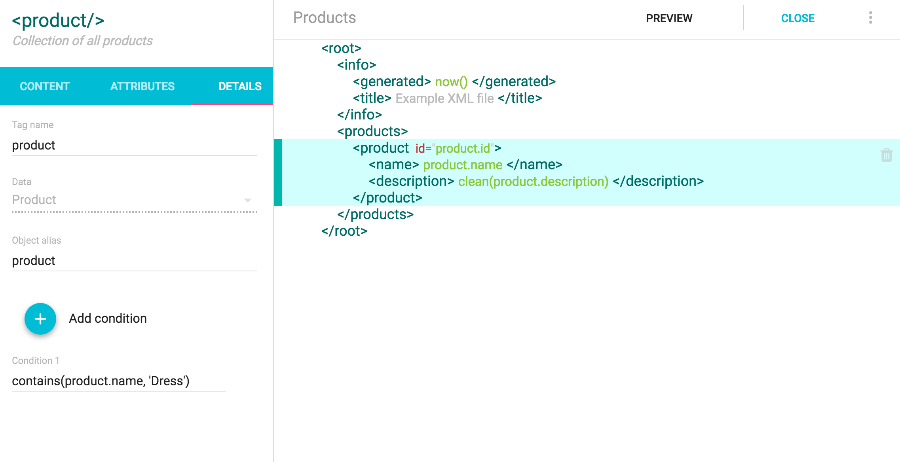
- Tag name - you can change node name here. Note that you can also rename nodes directly in template
- Data - you can choose data collection this node should be associated with. This will convert common node to data node - node will be repeated for every record in the data collection. Note that data collection can’t be changed once you used it in any expression. By removing / editing existing expressions you can make this field enabled again.
- Object alias - alias to be used for data node. You can use this alias to access collection data from expressions
- Restriction - this option is available only for data nodes that are children of another data node. It allows you to define the relationship between the parent and child node. For example, let’s assume we have Category node inside Product node. There are two relationships between these to collections - Product categories and Default product category. When you set restriction to Product categories, all categories this product belongs to will be exported. If you select Product default category, only one category will be exported for each product. You can also set restriction to All data, in which case no relationship between the collections will be used, and all categories will be exported for every product.
- Filter parent node - this option is also available only for data nodes that are children of another data nodes. When set to true, parent node will be omitted from the output if no child node is generated. This can be used, for example, to export only pjroducts with specific feature value.
Parameters
In the more options menu in upper right corner you will find an Edit Parameters option. It will open a page where you can create custom parameters. Once parameter is defined, you can use it in your expressions. You will need to provide parameter value when you generate XML file from the template.
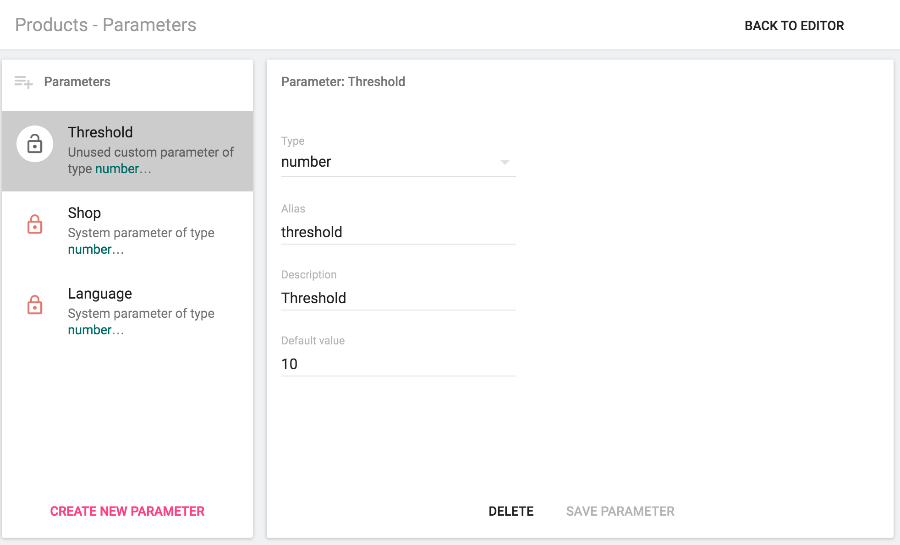
Parameters are great way to create reusable templates. For example, you can create numeric parameter Threshold and use it in a condition to filter out products with quantity lower or equal to than this parameter. You can then create two scheduled tasks. One will have parameter value set to zero, the other 10. These schedules will generate different xml files - the first one will list out of stock products, the other will list products with low quantities.
Another example is to create a parameter Category name and use it to filter products by category. You can than create different endpoint URLs to show products from different categories.