Cron
how to configure cron module
DataKick comes with a powerful built-in scheduler that allows you to set-up scheduled tasks. For example, you can generate XML feed for Google Merchant Center every midnight, or to generate backup of your orders every 30 minutes.
For scheduler to work correctly you need to integrate your webserver with Cron - an external service that periodically generates cron events. You can imagine it as clock ticking. On each tick scheduler checks if there’s any task to run, and possibly executes them.
To setup Cron service, click on main menu in upper-right corner and select Cron settings option. A dedicated page showing three different types of cron services will be shown:
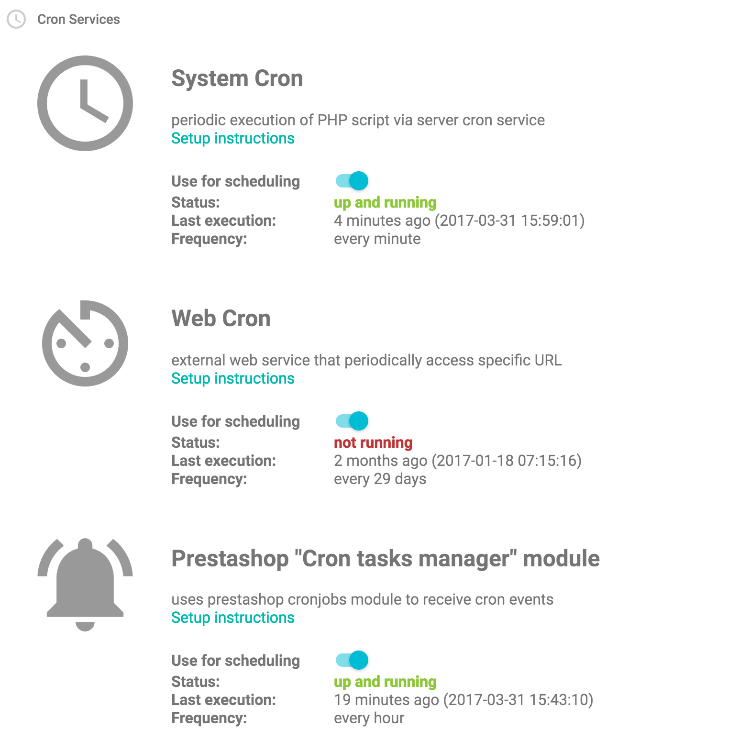
The first cron type, system cron, can be used only if you have ssh access to your webserver. It is based on operation system scheduler, and therefore is most performant, stable and secure.
Web cron is the most common cron type. External application on different server periodically access a dedicated url on your webserver.
If you have Cron task manager module installed, datakick will automatically use it to receive cron events. This is convenient option, but offers very low cron event frequency.
Cron frequency
Interval of cron events is very important configuration option. The more often cron events happen, the more precisely scheduler works. It is recommended to setup cron service with at least 5 minutes interval. You don’t need to worry about performance impact on your web server. Cron events are very inexpensive requests, they usually finish within few milliseconds. Your webserver shouldn’t have problem even with a one minute interval.