
Update opt-in status when customer unsubscribe from MailChimp
This tutorial demonstrates how to use mass updates to process webhooks
In this tutorial I’m going to show you how to automatically update your PrestaShop data when something interesting happens outside your web store.
In this particular scenario we will try to keep your newsletter opt-in preference in sync with MailChimp list. Anytime your customer unsubscribe from MailChimp campaign we will make sure to update his customer account in your PrestaShop.
What are webhooks?
So how are we going to achieve this task? By using webhooks. Webhook is a simple mechanism provided by many third-party services that will let us subscribe to some interesting events. Whenever these events happen, the service will open some URL on our server and pass this information to us.
All we need to do is to somehow react to these events. Usually your developer will prepare a small script that will process provided information and apply changes to your database. But with DataKick module you don’t need a developer. You can do it yourself, no coding knowledge is required. Just see how easy it is
Plan overview
- create Mass Update to modify your customer opt-in preference
- deploy this Mass Update to dedicated URL
- create IFTTT applet that will provide webhook functionality
Create Mass Update
We will use Mass update to update our customer’s opt-in settings. Although Mass udpates are designed to change multiple records, they can be used to change one record as well. So let’s create a brand new Mass Update based on Customers collection
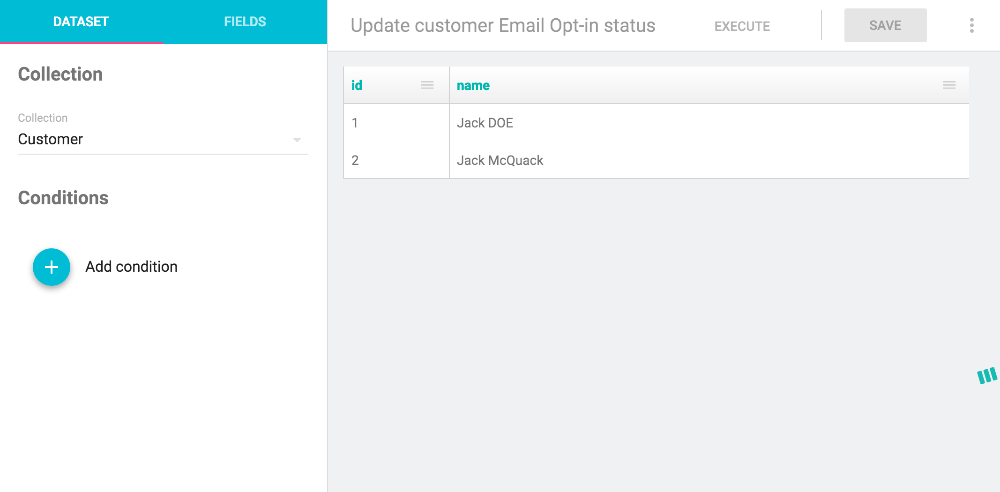
As you can see list preview, all customers would be changed by this Mass Update. But we need to update only one of them, based on email address. To achieve this, we will create a condition that will filter out all customers with different email address.
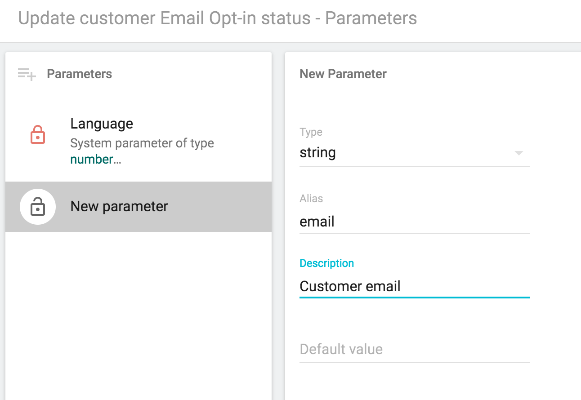
But first, we need some way to provide email address. That’s what parameters are for. So let’s create one. Click on the menu button in upper right corner, and choose Edit Parameters option. Then create a new string parameter
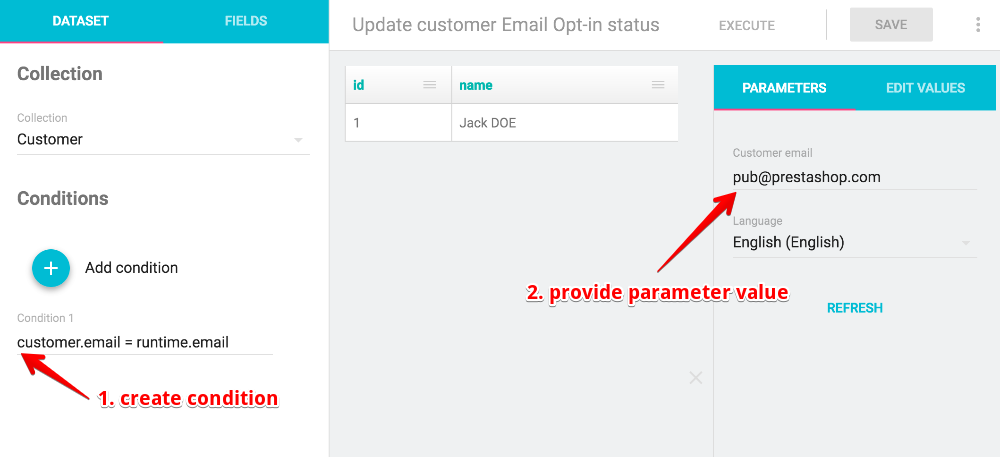
Once we define parameter, we can use it in any expression, including conditions. So go back to DataSet tab, click on Add Condition and enter this expression
customer.email = runtime.email
From this point, you will have to enter email address in Parameters section, and your Mass Update will be limited only to customer with matching email. Cool, isn’t it?
We are almost done. All we need to do is define what fields to update and how. In our case, we want to set opt-in field to false. To do so, switch to Fields tab, and find Opt In field in available fields. Add this field to Fields to update section. The default update action for boolean fields is to set value to false. And that’s exactly what we need.
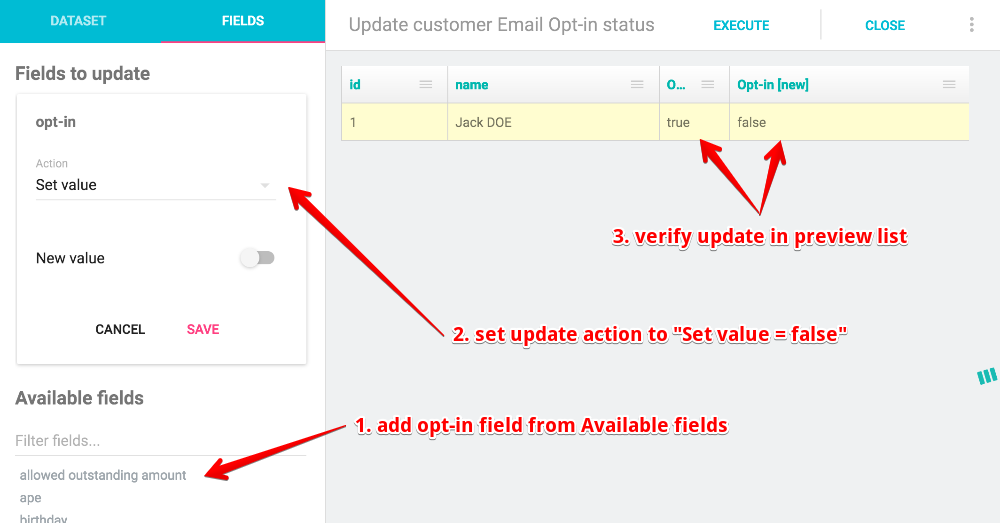
You will notice that preview list now contains two more column. One showing current value of Opt-in field, the other showing new / future value of this field. You can hit Execute button to test that customer record is correctly updated.
And that’s all. We have prepared reusable Mass update. We just need to name the template appropriately and save is.
Deploy Mass Update to dedicated URL
We can do a few things with saved updates. We can execute it manually, create scheduled task to run it on regular basis, or we can create endpoint URL that will trigger its execution.
In our case we will choose the third option. To create URL, simply find your mass update in list of mass updates, and click Create new URL button. Fill in all required fields in Endpoint form:
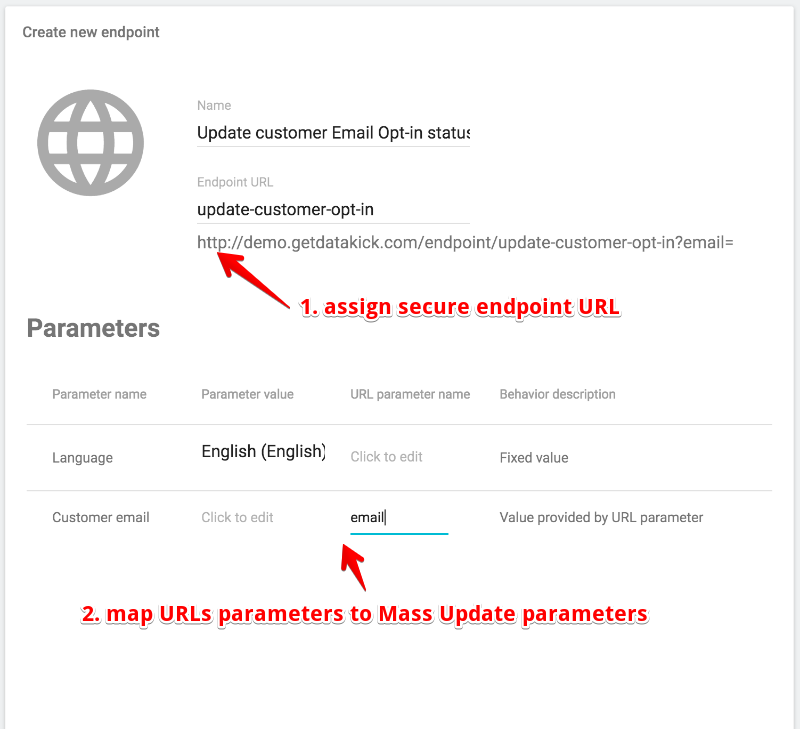
Make sure to assign unique and hard to guess endpoint URL. Also you need to map url parameters to Mass Update Parameters.
Write down the full url of this endpoint, including url parameters. Open this url in new browser window to test that it works correctly. Don’t forget to append valid email address of one of your customers.
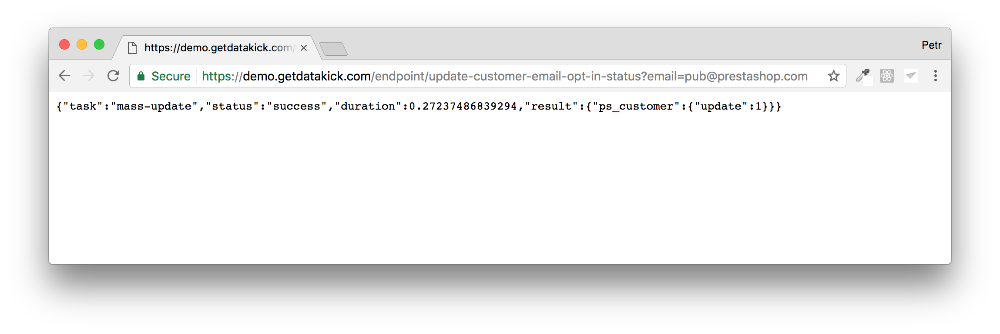
If you now open this customer in your backoffice, it should have Opt-In status set to false. DataKick will also show a new Mass Update execution in list of recent executions.
Wire it all together
Our backend is ready to receive webhook calls. So let’s put it all together. We will use IFTTT service to generate webhook calls.
IFTTT is a short for if this then that - amazing service that let you bind together various other services. One always works as a event source, the other as target.
For example, you can use it to
- if tweet contains hashtag then save it to google spreadsheets
- if you receive email then create a new task in trello
- if user unsubscribe from MailChimp mailing list then execute webhook call
You guessed it. We will use the last recipe, or applet in IFTTT terminology. So sign up for a free IFTTT account, and then create a brand New Applet.

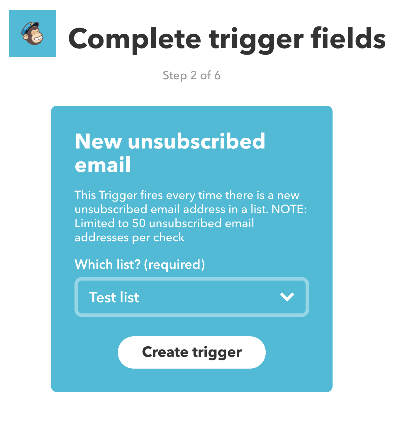
Click on + this to define trigger - source events. Find MailChimp service, select New unsubscribed email event and choose your mailing list.
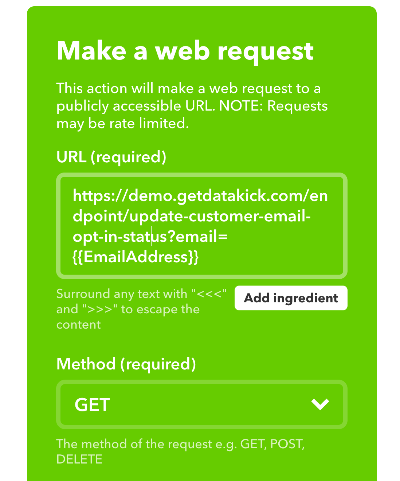
Next, click on + that to define action - target service. Choose Maker Webhooks service. In the URL field, enter url of endpoint created in previous step.
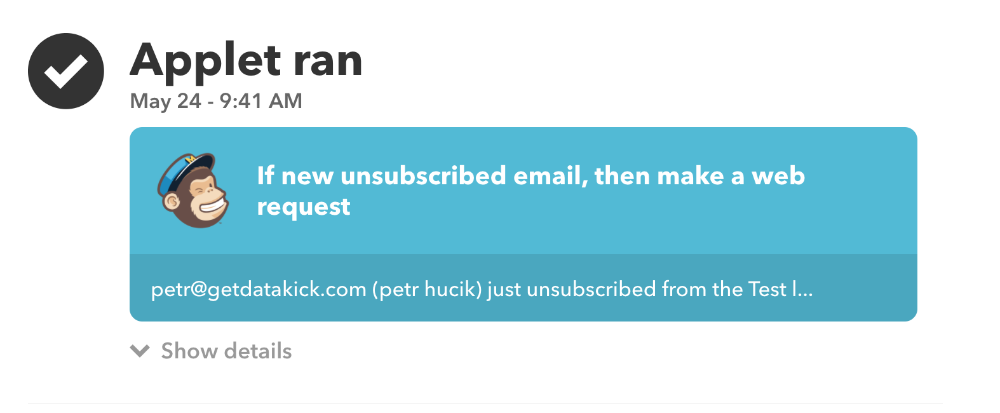
And we are done. From now on, when your customer unsubscribe from mailing list his account in your PrestaShop will be updated as well.
Please note that it may take some time for IFTTT service to retrieve changes and notify your server. But it shouldn’t take longer than hour. And you can always upgrade to premium version to have more real-time experience.